JAVA Tutorial I – Installing Eclipse and Setting Up the Project
There are many good IDE’s out there, but Eclipse is good for beginning JAVA. I started learning JAVA through Eclipse. So you should go and download it.
Eclipse Download
- First, go to the Eclipse downloads page on its website and download the following file
This is What the download should look like, except it will say "Windows" or "Linux" if that's What You Use
Unpack It and Install It
- Install the program and choose the directory in which you want your files to be saved in. Then open the application.
Start the Project
- Go to File > New > Java Project
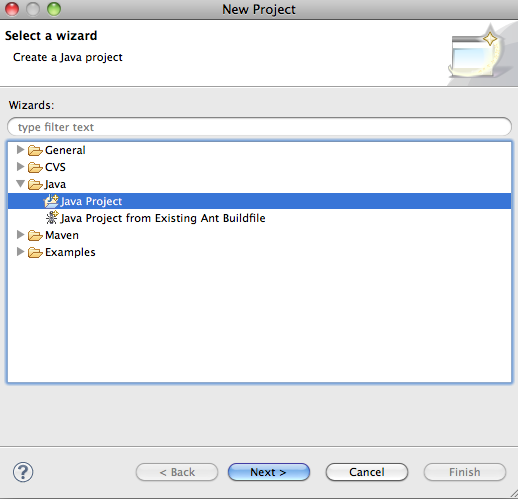
After you open the new project, the screen should look like this. Select Java Project just like in the picture.
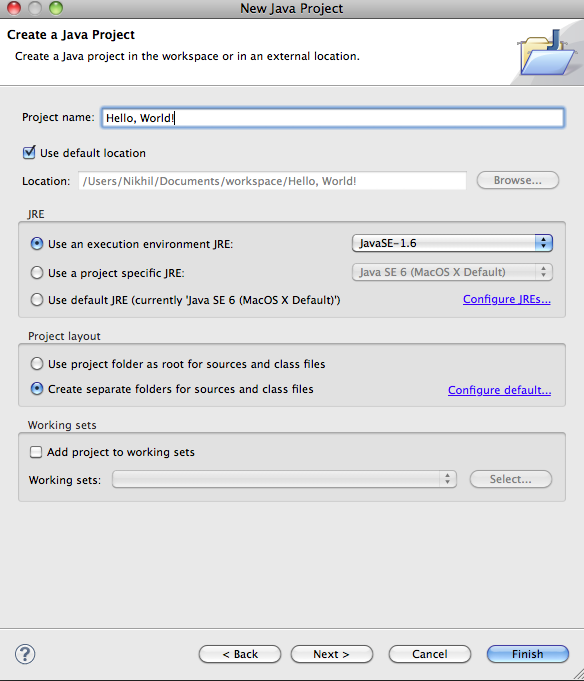
2. Name Your Project
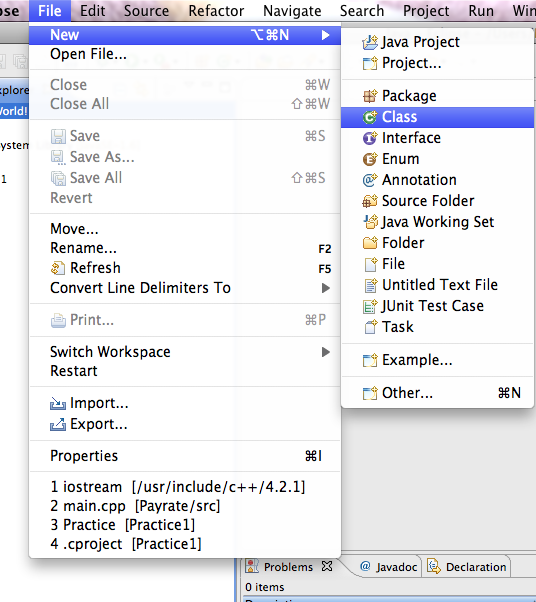
3. Go to File > New > Class
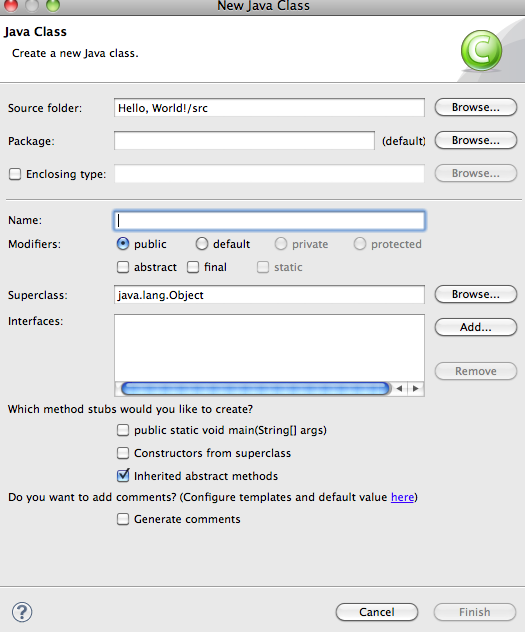
- First, click “Browse.” Search through the folders until you come across the folder that shares the same name as your project. If the Source Folder was automatically named after your project, then you don’t have to go through the “Browse.” Then, click “Finish.”
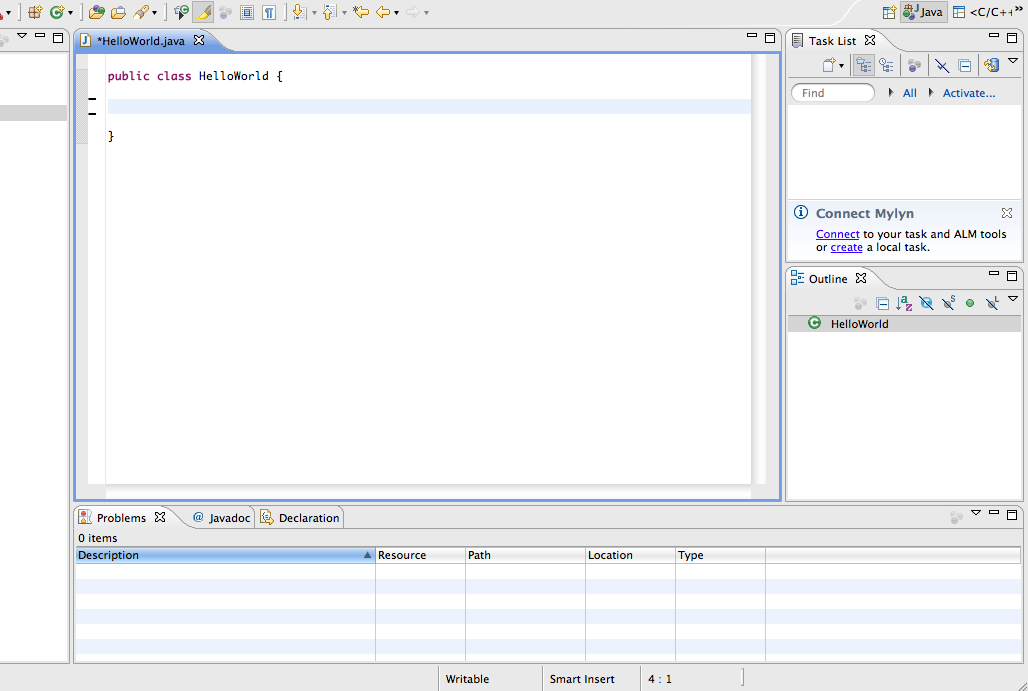
- This is what your screen should look like.
Good job! You set up your Eclipse project and you are ready for programming!
-
</p>
-
<<Previous Page – Alright, You’re Ready For Program – Next Page>>


Leave a Comment