How to Organize Your Apps on an iPhone
The iPhone is an amazing piece of technology. If you’re still not privy to this ubiquitous trend, then you should know that people use their iPhones to connect with their family, get directions, and run their day to day lives. Many people could not imagine their lives without an iPhone. One of the biggest benefits of the phone is all of the apps available for download. There are literally thousands of apps to choose from, no matter what you need to make your life more fun, manageable or even profitable. Unfortunately, too many apps can spell trouble, causing the phone to become cluttered and unorganized. It can also be overwhelming for those who are new to technology. If this sounds familiar to you, then here are four steps to organize your apps!
Get in the Know
You should know how many iPhone applications you have, and what type of applicants they are. The easiest way to check is to connect your phone to your iTunes program. After syncing your phone to your iTunes account, open the Apps icon in the navigation bar on the left. Here, you will be able to view all of the apps installed on your iPhone. This will give you a good start in cleaning up your cluttered phone. You can organize your applications in any number of ways, alphabetically, program type, or date installed. Now, you should have a clear idea of your situation.
Uninstall
Lets face it, a lot of us installed useless applications, while others have become out of date. Check out the last time you have used the app. If it has been months, or even years, consider removing the application. Also, when uninstalling apps, look for duplicate applications. There is no need to have two weather apps or two sports apps – one app per subject should suffice. It’s likely that one or two of these apps were downloaded for some kind of promotion (“Get a 5% discount by downloading our app!” – Sound familiar?), and if that’s the case, never fear! You did your part – they obviously haven’t given you any reason to stay on as a customer! In the worst case scenario, you can always download the application again. Maybe it’d be better on a different platform, such an iPad.
Create Folders
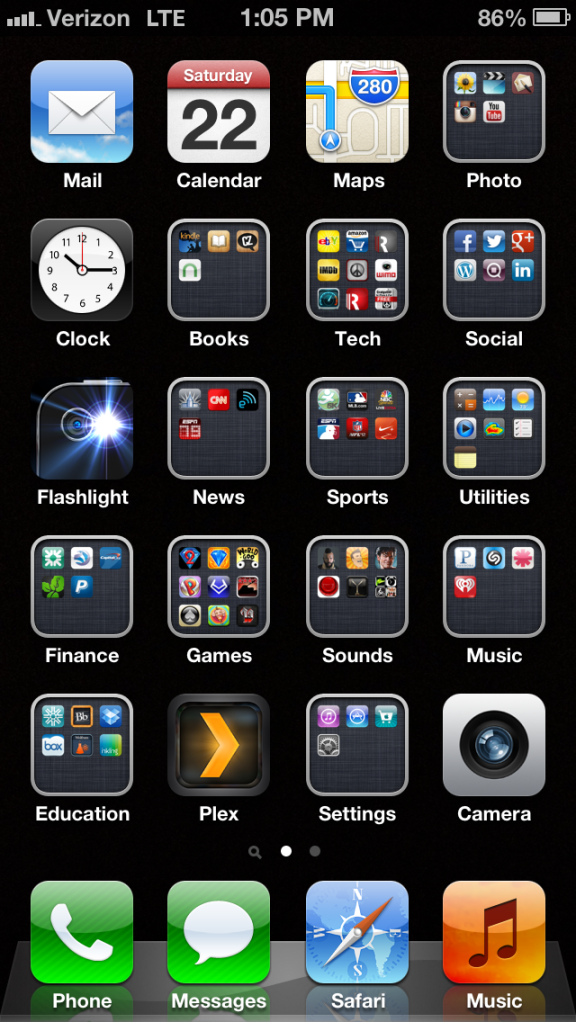
After you have consolidated your apps, you should create folders. Though it is a tedious process, it will be the most important process in getting organized. You will need to create folders based upon your supplied parameters. For example, you can make a folder for finance, photography, games and so on. You can put up to 12 apps into a single folder, and this should suffice when wanting to clean up your iPhone screen. Remember, this process might take a long time, especially if you have a lot of apps on your phone, but you can likely get all your apps onto a single screen if that’s your goal!
Efficiency
This tip only applies if you don’t mind having multiple pages of apps to scrolls through. And for us in this camp, it is not uncommon to have dozens of applications. So, put the most used apps on the first or the second page – this makes them much more accessible. Remember, most apps are not used daily (for instance, an Airline app or Netflix), so it only makes sense to move those to the back of the line. Also remember that you’ll thank yourself later if you put closely related apps together – credit card apps, for example.
The iPhone is a great tool for our busy lives. Nowhere is the iPhone more impressive than in the applications arena. Unfortunately, a lot of people go crazy and download too many apps, which becomes difficult for them to organize. Luckily, thanks to a little program called iTunes, you should be able to organize your applications in no more than an hour or so.
Author Jason Harter makes apps his life, as he develops them and makes a living by selling them. He acquired these abilities by attending one of the Best Computer Science Schools


Leave a Comment