Cocos2D For iPhone Tutorial I – How To Install Cocos2D for iPhone in Xcode
I’m assuming you already downloaded Xcode. Try to get the latest version, though Xcode 3 works just as well. I am also assuming you are using a Mac. Doesn’t make much sense to try and install Cocos2D on a platform, which…Well, I’m sure you get the point. My drawling on won’t install Cocos2D on your computer. What will, are the following steps:
1. Get Cocos2D! This is if you hadn’t already downloaded it. Click here, and download the STABLE VERSION. The unstable version, is well, kind of like a bipolar divorcee.
2. Unarchive the file, or unzip it. Same thing. Double-click the file you just downloaded. A folder should appear.
3. Drag the folder to the desktop. It makes for easier use.
4. Open Terminal. If you aren’t familiar with Terminal, it is the Mac equivalent of the Windows’s Command Prompt. Just go to Finder, click Applications, and scroll till you find Terminal. Open it.
5. Type “cd” (make sure you leave out the quotations. Then hit the spacebar once after you typed the c and d)
6. Remember the folder from Steps 2 and 3? Well, you need to drag the entire folder from your desktop into Terminal. Make sure there is exactly one space between where you dropped the folder, and the letters c and d.
7. Press return.
8. Type the following: ./install-templates.sh -u
9. Press return.
10. If you did everything correctly, text should be appearing at an inhuman rate in the Terminal window. If not, it has to probably due with the text you have to type manually. Check everything once more.
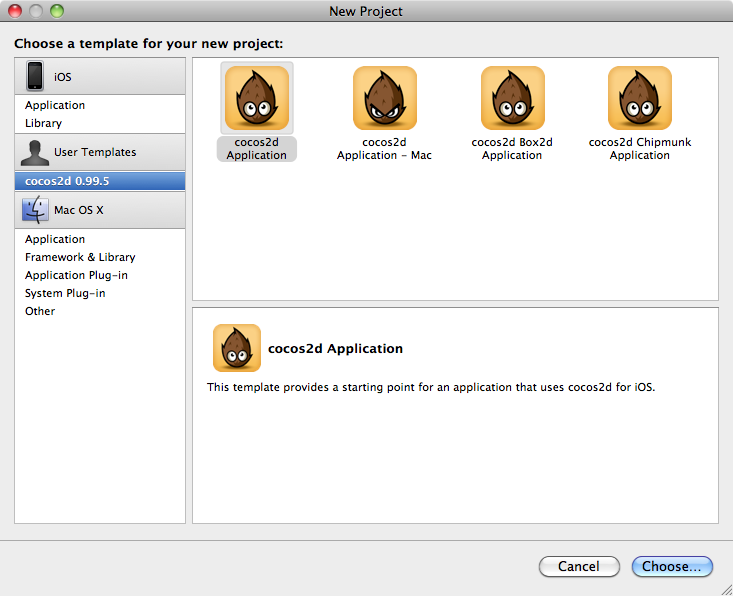
11. Once the text stops, open Xcode. On the left side of the Xcode Menu Window, under templates, you’ll notice the new User Templates which you just added!
12. You are ready to roll now! If you have any problems, contact us and we’ll fix the tutorial.


Leave a Comment