Python Basics 101 – Part III: How to Create a Python Script in iPython Notebook
Hopefully installation of iPython Notebook was successful. After installing and running the notebook, let’s create a project. After running iPython Notebook and navigating to the localhost server, let’s begin making a project.
1. Create a New Notebook

You should see this screen when you navigate to the correct page.
Click on the button that says “New Notebook” on the far right.
2. Writing and Executing a Program

This is what the Notebook looks like.
Click on the section that says “Untitled1” (it may say Untitled0 for you). Rename the script “Hello iPython Notebook!” Next, in the area with the green rectangle around it, type the following script: print “Hello iPython Notebook!” Then, click the play button above the green box.

Enter the above script into the box. To run the script, click the Play button underneath the title.
There! That’s how you run a Python script in iPython Notebook.
3. Downloading Your Script
iPython Notebook automatically saves the files as .ipynb. This is not very useful especially if you want to open the file into another IDE/Text Editor. So let’s download our beautiful script as .py file.
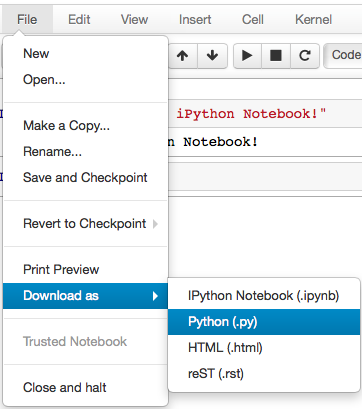
Navigate File > Download as > Python (.py) to download the file
After you have downloaded the file, you can go to your downloads folder and there it will be.

There is our groundbreaking python script!
Congratulations! You now know how to make Python scripts in iPython Notebook!


Leave a Comment