An Introduction to the Wonderful World of Infrared Photography
Taking pictures at night used to be impossible without having some sort of light source. These days, technology has changed all that. With the use of infrared, or IR, cameras can capture images even in scenes with little or no light. Best of all, IR is not visible to the human eye, so you can take photos at night without anyone knowing, or without disturbing wildlife for example. Using this technology during the day can also create some stunning photographic effects. Read on to find out how this technology works and what you need to start taking infrared photos.
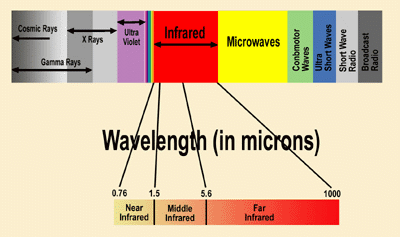
An understanding of infrared light is helpful here. Infrared light occupies the wavelengths from about 700 nanometers to 1 millimeter. These longer wavelengths of light are not visible to the naked human eye, and lie beside red visible light on the spectrum. The infrared light referred to in IR photography covers 700 nanometers to 900 nanometers and is within the near infrared spectrum. The rest of the infrared spectrum involves mid infrared and far infrared, which is used in thermal imaging.
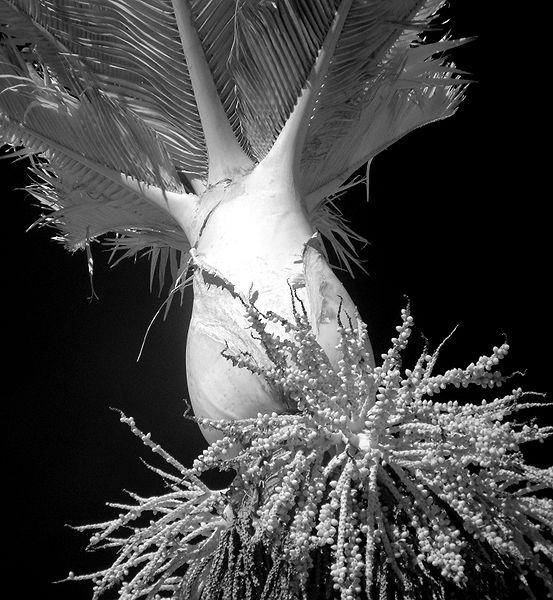
While IR light allows a camera to capture images in the dark, standard cameras use an IR filter to prevent this light from entering the camera. Removing or adjusting this filter will cause daytime photos to appear overly white, but not washed out as in the photo below. This is accomplished by allowing IR light to pass through to the camera while blocking most of the visible light spectrum. When used on foliage, the reflection of light off of the leaves gives a white, almost snow-like effect. The effect is known as the Wood Effect after the infrared photography pioneer Robert W. Wood. Infrared photography also tends to make the sky very dark, as seen in the photo below. Other effects of infrared photography include the ability to penetrate some clothing, veins being visible under skin, eyes becoming black, and skin appearing pale.
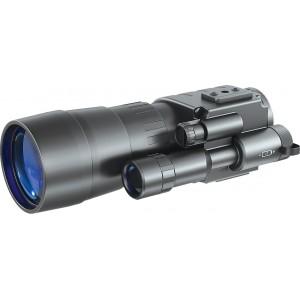
The use of IR light in nighttime or dark scenes gives the effect of being able to see in the dark. Infrared light will “light up” a scene without the scene becoming more visible to the naked eye. This technology is used in surveillance cameras and trail cameras for photographing wildlife. It is possible to take night vision photographs with a standard camera by simply holding a night vision device in front of the lens. Night vision devices come in several configurations including binoculars, monocular, goggles, and scopes. These devices work by either amplifying ambient IR light or by projecting IR light onto the scene to light it up. The illuminated image is then sent to the viewing lens or onto a display. The photo below shows a night vision monocular.
This setup is a good way to take infrared photos if your camera does not have the ability to adjust the IR filter. However, it is not necessarily cost effective unless you already own a night vision device or have other uses for one, as these devices cost hundreds of dollars.
If you decide to go the camera/night vision device route, you will need a way to hold the night vision device steady in front of your camera. You can use a camera slidebar, which can be found in camera stores or online, or you can build your own setup using wood or other materials.
So whether you opt to adjust the camera you already have or go with a night vision and camera setup, you can easily start taking IR photos and night vision photos. Once you get the basic method of IR photos down, you can start using more advanced techniques which can be found with a Google search.
Craig Pearson is an avid hunter, outdoorsman, and adventurist. His main passions are hog hunting in Texas and writing about his many adventures. He currently blogs for nightvision 4 less, a supplier of high quality night vision equipment.


Leave a Comment